
Here is the easiest way to build your own custom AI support chatbot based on your product docs.
Dedicated tools for this are often very expensive. Intercom’s Fin AI bot, for example, can charge around $1 per resolution. When you handle thousands of support queries, this adds up quickly.
An excellent way to build it yourself, without having to code, is by using an n8n workflow.
If you don’t use n8n yet, you can get started here: Install n8n.
However, building a reliable and production-ready RAG (Retrieval-Augmented Generation) system in n8n is not an easy job. Most templates available are just surface-level and aren’t robust enough for a real-world use case. Lookio has been built exactly for that, making it super easy and scalable to build assistants that run deep RAG on top of your knowledge base and integrate them into n8n workflows.
This guide will show you how to combine n8n’s chat widget with a powerful Lookio Assistant.
Step 1: Configure your knowledge base and Assistant in Lookio
First, we need to get your product knowledge into a Lookio Assistant that your chatbot can query.
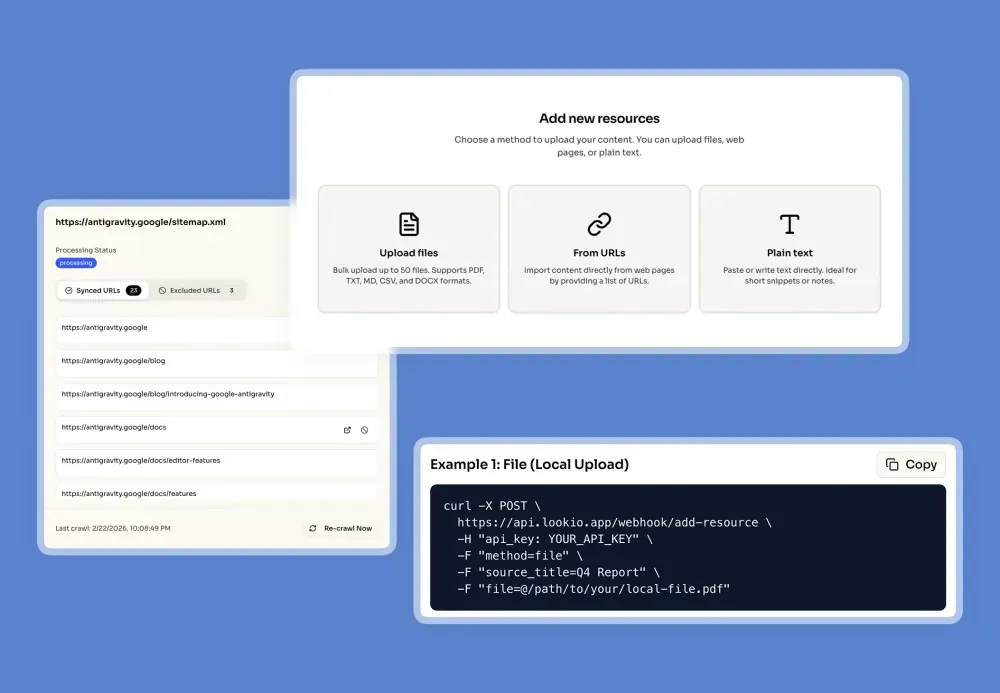
- Consolidate and Upload Your Knowledge: Gather all your knowledge sources—product documentation, user manuals, etc. Create a free Lookio account at lookio.app and head to the “Resources” page. You can upload PDFs, TXT files, paste text directly, or sync entire Sitemaps. For large documentation sites, you can use Exclusion RegEx (with the help of our AI RegEx Helper) to precisely target only the pages you want (e.g., only including the latest version or specific language folders). This ensures your bot is always working with clean, structured knowledge. Give each resource a clear name and add a source URL, which allows your Assistant to cite its sources later.
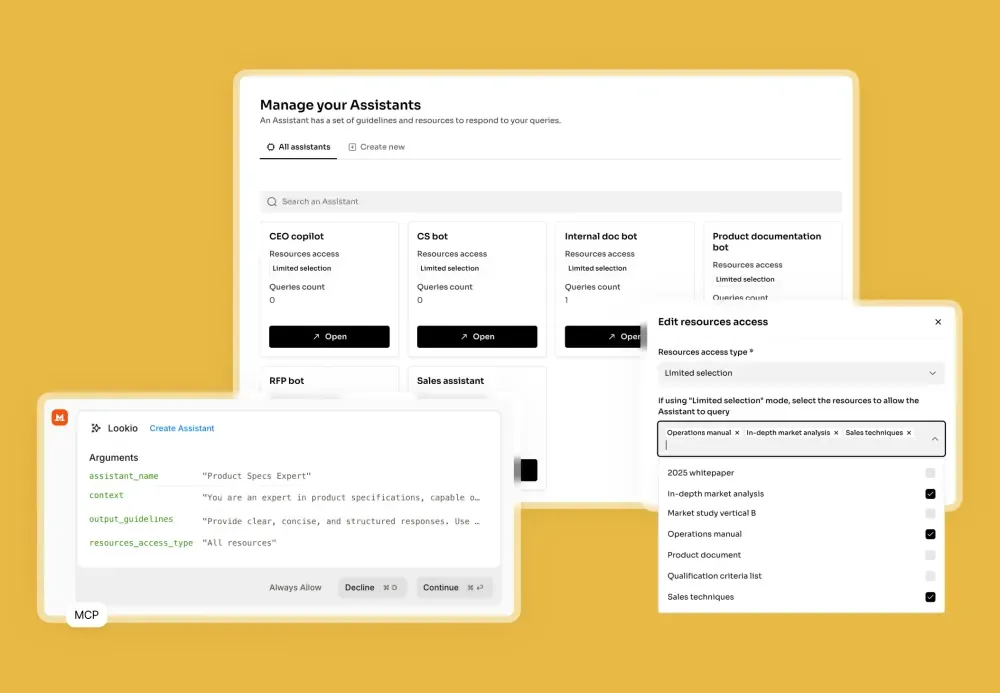
- Create Your Assistant: Next, go to the “Assistants” page to build your AI. Give it a clear name (e.g., “Product X Support Assistant”) and describe its purpose in the context field. This is where you set the rules. For example: “You are a friendly and helpful support assistant for Product X. Your answers must be concise and based only on the provided documentation.” You can also set output guidelines, like specifying the language or tone. Finally, select which of your uploaded resources this Assistant should have access to.
- Get Your API Key: The final configuration step is to navigate to the API key page and create a new key. You will need this key to connect Lookio to your n8n workflow.
Step 2: Build the chatbot widget in n8n
Now it’s time to build the user-facing part of your chatbot. n8n makes it very easy to publish a chat widget on your website that opens a chat modal when clicked.
To get this live, follow these steps in your n8n instance:
- Create a workflow with a “Chat Trigger” node. In its settings, make sure you enable public access.
- Add an AI node (like an AI Agent) and a “Respond to Chat” node to handle the logic and send answers back to the user.
- Activate your workflow.
- Get the public URL of your chat trigger and prepare the embed code with the help of n8n’s chat documentation.
- Add the code snippet to your website or app.
Your widget is now live. Whenever a user sends a message, it will be processed by your n8n workflow.
Step 3: Integrate Lookio into the n8n workflow
The final step is to connect your n8n chatbot to your Lookio Assistant. To make this as easy as possible, we’ve published a ready-to-use template in the n8n community gallery.
Template Link: /templates/build-an-intelligent-q-a-chatbot-in-n8n-in-lookio
The template provides a simple, three-step workflow:

Copy the template to your n8n instance. The key part is the HTTP Request node, which you need to configure with your Lookio details:
- Authentication: Header Auth
- Name:
api_key - Value: Paste your API key from Lookio here.
- Name:
- Body Parameters:
{
  "query": "{{ $json.user_query }}",
  "assistant_id": "YOUR_ASSISTANT_ID",
  "query_mode": "deep"
}
Let’s break down the body:
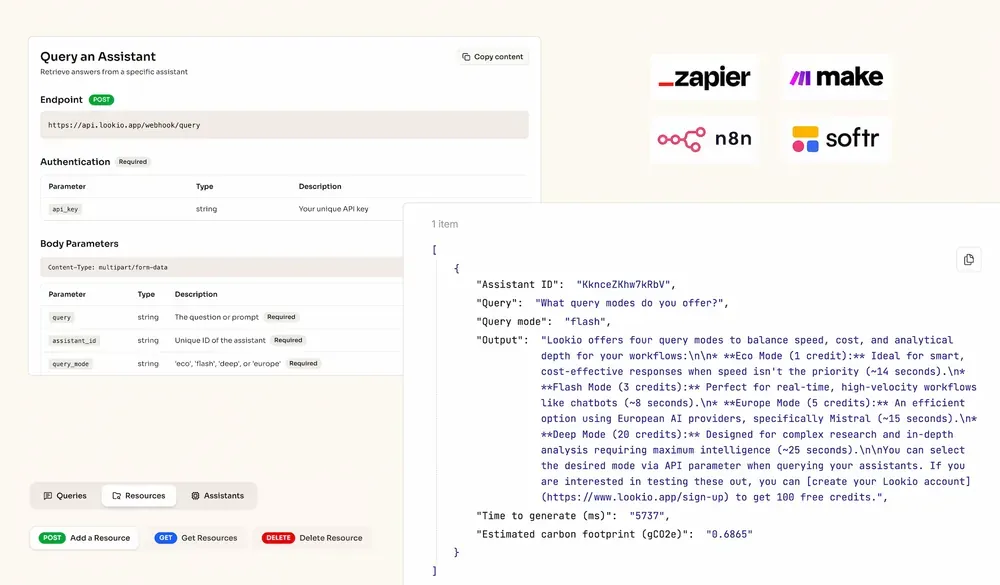
query: This links to the output of the chat trigger, passing the user’s question to Lookio.assistant_id: ReplaceYOUR_ASSISTANT_IDwith the actual ID of the Lookio Assistant you want to query.query_mode: Lookio offers two modes. “flash” is the fastest and is ideal for real-time chatbots (costs 3 credits). “deep” is our smartest mode, which we recommend for complex support queries where quality is the top priority (costs 20 credits).
From the user’s perspective, the integration is invisible and seamless. They simply interact with a modern chat interface and receive intelligent answers in seconds.
Once you’ve set this up and activated the workflow, your chatbot can send any query to Lookio and receive a high-quality, sourced answer back from your private knowledge base. You now have a production-ready AI support bot running at a fraction of the cost.